
The bathroom that makes you sigh every time you walk in — too tight, too dim, too beige — is rarely the result of square footage. It’s almost always a result of the wrong design decisions layered on top of each other over the years.
Here’s what most people don’t realize: a small bathroom is one of the most cost-effective spaces in a home to genuinely transform. Because the footprint is compact, the same budget that might only touch one wall of a master bath can cover a complete, high-spec overhaul here. Premium stone, unlacquered brass, frameless glass — all of it becomes achievable when the square footage is modest.
The following strategies are what experienced designers consistently reach for when a client wants a small bathroom that feels both larger and genuinely luxurious.
Clear the Floor: Floating Fixtures That Open Up a Room
Install a Wall-Mounted Floating Vanity
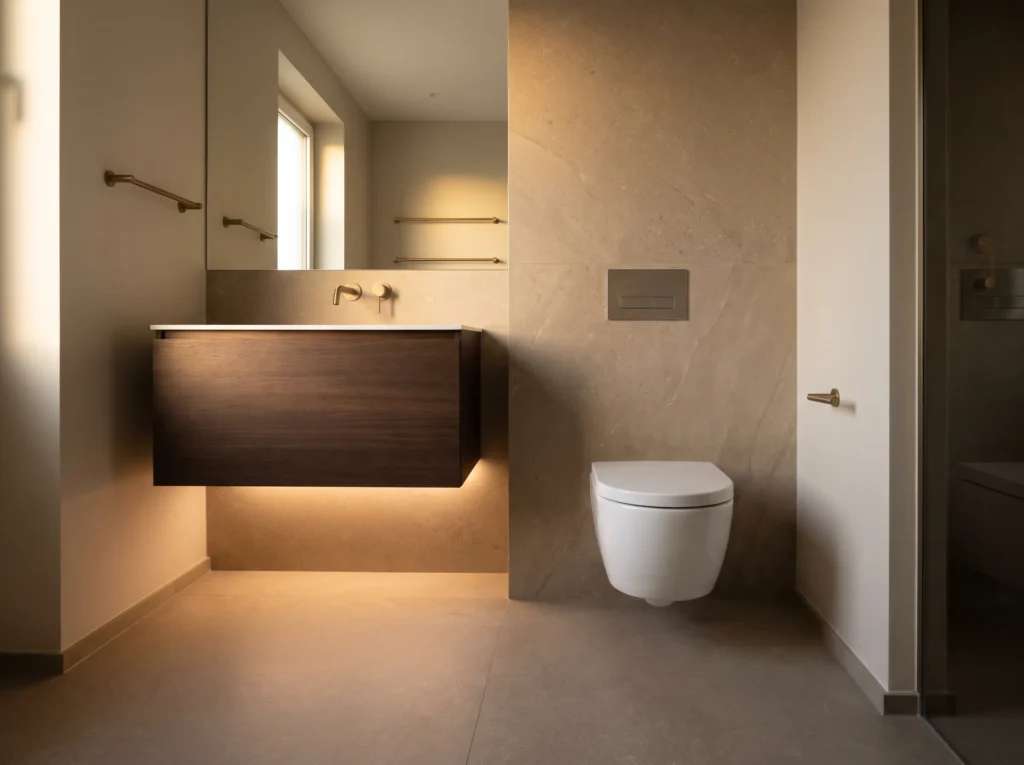
A floor-standing vanity acts as a visual barrier. The solid base stops the floor tile dead, and the eye registers that stop as a wall — one that’s much closer than it actually is. Mount the vanity on the wall instead, and the floor runs uninterrupted all the way to the base of the cabinet. The room immediately reads as larger because there is genuinely more visible floor.
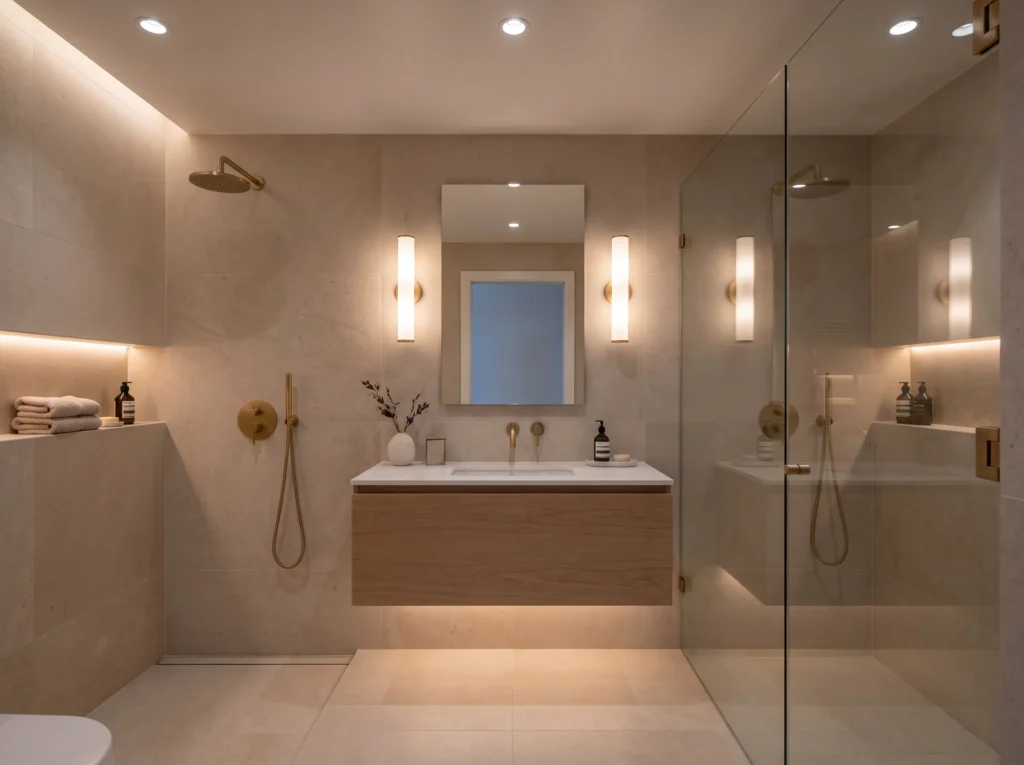
This is one of those changes that, in practice, consistently surprises people. They expect the floating vanity to make a small difference. The visual shift is actually significant. Add concealed LED strip lighting along the vanity underside. That soft wash of light across the floor creates the impression that the cabinet is hovering — weightless — and amplifies the spatial effect considerably.
Switch to a Wall-Hung Toilet with a Concealed Cistern
A standard two-piece toilet is bulky in a way you stop noticing until you replace it. The tank, the pedestal, the junction between tank and bowl — all of it adds visual mass and consumes floor space. A wall-hung toilet with an in-wall concealed cistern removes the tank entirely from view. The water reservoir sits inside the wall cavity. What remains is a clean bowl suspended above the floor and a flat flush plate flush with the wall finish.
The floor beneath the toilet is now fully exposed and cleanable, which matters both aesthetically and practically. The hidden tank also dampens the refilling cycle almost completely. That quiet, unhurried acoustic quality is one of the defining characteristics of high-end hotel bathrooms. It’s entirely replicable at home with this one fixture choice.
One thing to plan for: installing a concealed cistern system requires access to the wall framing. It’s best handled during a full renovation rather than as a retrofit. If you’re already opening walls, this is exactly the right time to do it.
Build Seamless Surfaces from Floor to Ceiling
Visual interruption is what makes compact spaces feel cramped. Every seam, every color change, every material transition is a boundary line the brain registers as a boundary of the room itself. Reduce those transitions, and the room stops feeling cut up.
Use Large-Format Tiles with Tight Grout Lines
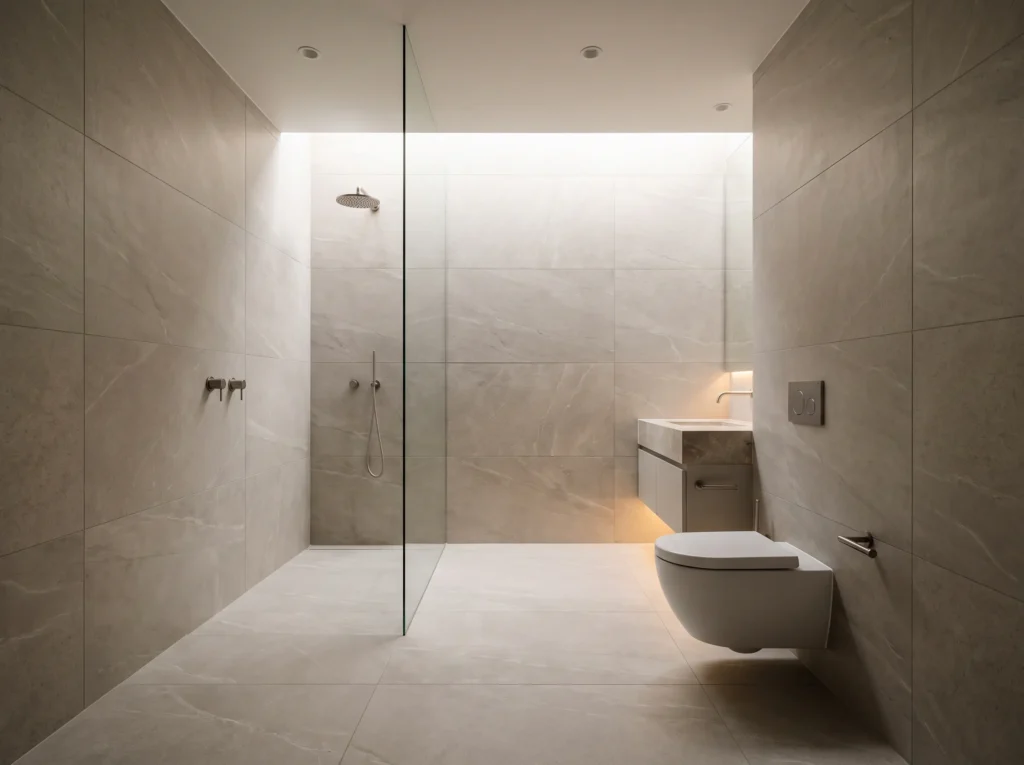
Mosaic tiles and busy geometric patterns fill a small bathroom with hundreds of intersecting lines. The eye can’t rest. Large-format porcelain or stone slabs — 24×24 inches or larger — dramatically reduce the number of grout joints across the same surface area. The field of view quiets down.
What most people overlook is the grout color. Rectified tiles installed with grout that’s slightly darker than the tile shade actually read as more joints, not fewer. Match the grout to the tile as closely as possible. That monochromatic uniformity makes surfaces look continuous rather than assembled from pieces.
Run Tile from Floor to Ceiling
Stopping tile at chair-rail height or mid-wall is one of the most common decisions that quietly shrinks a bathroom. That horizontal line divides the room into two visual zones — the tiled bottom half and the painted top half. Both halves feel smaller than the room actually is. Run the tile all the way to the ceiling and the vertical surface becomes one unbroken plane. The eye follows it upward, and the ceiling reads as higher than it is.
Design a Curbless Shower with Frameless Glass
A shower curb is a low barrier, but visually it functions as a wall. So does an opaque shower curtain or a framed glass enclosure with chunky metal headers. A curbless, frameless shower removes all three of those interruptions in one move.
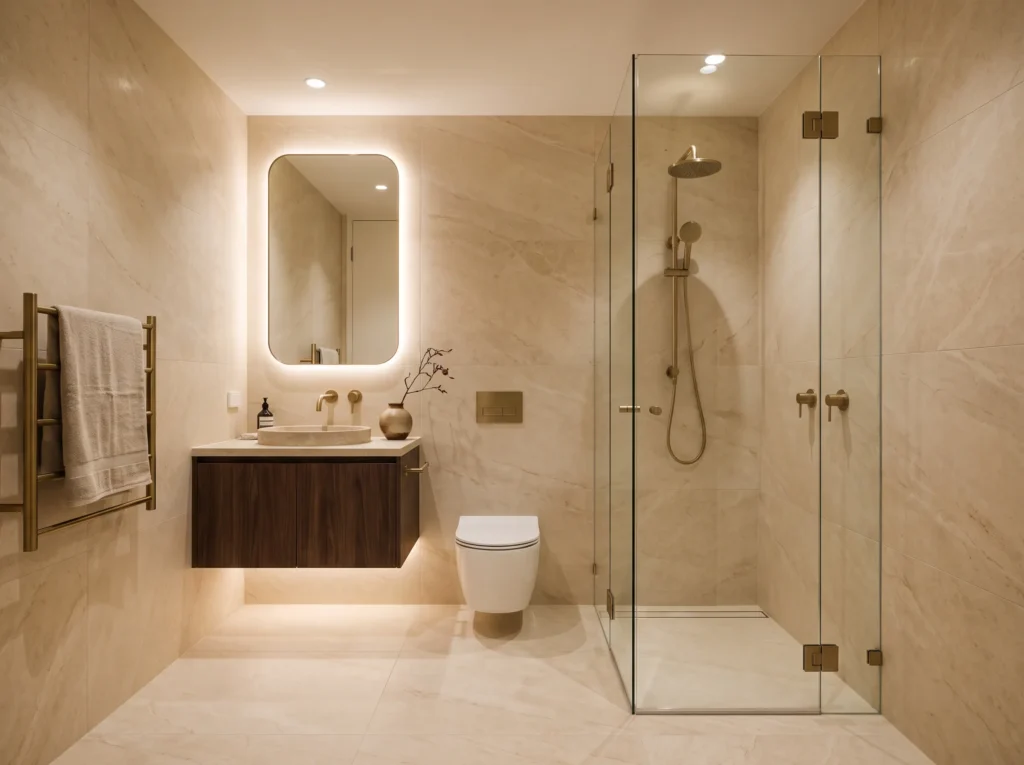
The main floor tile continues directly into the wet zone with no step and no break. A single clear glass panel — no frame, no metal header at the top — preserves the sightline from one wall of the bathroom to the other. You can see the full depth of the room. That’s exactly what makes the space feel bigger.
Layer Your Lighting Rather Than Relying on One Source
The single overhead downlight is probably the most common mistake in small bathroom design. It casts hard shadows downward — under the eyes, under the chin, into corners. The room feels dim and closed-in even when the bulb is bright.
A well-lit small bathroom uses three distinct sources, each doing a different job.
The Three Sources That Work Together
- Ambient lighting: Recessed ceiling fixtures or a slim flush mount provide gentle overall illumination. This is the base layer — it fills the room without focusing anywhere in particular.
- Task lighting: Vertical wall sconces on either side of the mirror — roughly 60 to 66 inches from the floor — illuminate the face evenly from both sides. No shadows. This is the light you actually use for grooming, and it makes a noticeable difference in how the room functions.
- Accent lighting: Low-voltage LED ribbons tucked inside shower niches or beneath the floating vanity add depth. These aren’t for illumination — they’re for dimension. They make the room feel layered rather than flat.
What CRI and Kelvin Actually Mean for Your Bathroom
Color Rendering Index (CRI) measures how accurately a light source reproduces color compared to natural daylight. A CRI of 90 or above is the threshold for high-quality residential lighting. Below that, skin tones go dull, natural stone loses its warmth, and towels look slightly gray. Specify CRI 90+ for every fixture in the bathroom. It’s a spec that costs almost nothing extra to request and makes a visible difference daily.
Kelvin temperature controls warmth versus crispness. For ambient and accent zones, stay within 2700K to 3000K — warm, flattering, and relaxing. For task lighting around the mirror, a slightly cooler 3000K to 3500K gives better clarity for grooming without feeling clinical. Wire every circuit to a smooth dimmer and you can calibrate the balance for morning versus evening use.
Move Your Storage Inside the Walls
A cluttered countertop doesn’t just look messy — it pulls attention to the edges of the room and makes the space feel occupied. Recessed architectural storage keeps everyday items accessible without adding any visual bulk.
Flush-Set Recessed Medicine Cabinets
A surface-mounted medicine cabinet projects several inches into the room. In a small bathroom, that projection is noticeable — it reduces headroom over the sink and adds a boxy element to the wall. A recessed cabinet sits completely within the wall stud cavity. The face sits flush with the surrounding tile or paint, and the storage capacity is identical.
Look for designs with full-overlay mirrored doors that run edge to edge. If you can specify an integrated electrical outlet inside the cabinet, do it. Electric toothbrushes, razors, and styling tools disappear behind the door and charge overnight without cluttering the countertop.
Shower Niches Built Into the Wall
A wire basket or suction caddie attached to the shower wall is functional but visually distracting. A built-in niche recesses the storage flush with the tile plane. Shampoo and body wash are organized, out of the direct shower spray, and invisible until you need them.
Line the niche interior with the same tile or stone used on the surrounding shower walls to keep the surface continuous. Pitch the niche sill forward — even a few millimeters — so water doesn’t pool. Standing moisture inside a niche leads to mineral buildup that’s tedious to remove and can eventually damage grout. No niche stays dry in a poorly ventilated bathroom regardless of the sill pitch — bathroom ventilation is a separate decision that’s worth getting right.
Commit to Quality Materials and One Consistent Finish
Small bathrooms reveal material quality faster than large ones. There’s nowhere for a thin veneer or a hollow-feeling fixture to hide. This is actually an argument for spending more per piece — you need fewer pieces, and each one is always on display.
A Single Stone Surface, Used Generously
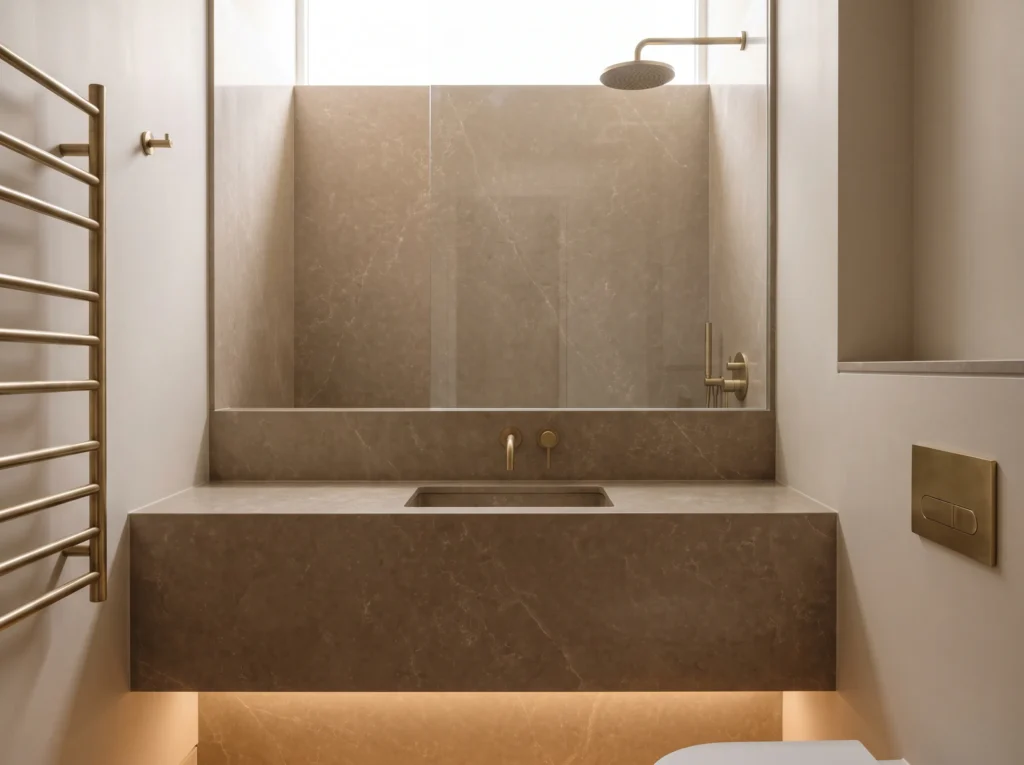
Carry one stone material consistently — across the vanity top, up the wall as a backsplash, and into the sink if the design allows. That kind of continuity reads as architectural rather than cosmetic. Carrara marble, Calacatta quartzite, and high-performance engineered quartz all work well in this context. The key is one material used boldly, rather than multiple materials competing for attention.
Pick One Metal Finish and Hold to It
In a large bathroom, mixing two metal finishes — brushed nickel fixtures with matte black cabinet hardware, for example — can work if the proportions are balanced. In a small bathroom, it almost always reads as inconsistency rather than intentional contrast. Every mixed finish is another visual break in a space that has very little room for breaks.
Choose one finish — unlacquered brass, brushed nickel, matte black, or polished chrome. Use it across every point of contact: faucets, shower trim, towel bars, robe hooks, and the toilet flush plate. That kind of discipline is exactly what distinguishes a thoughtfully designed bathroom from one that was assembled piece by piece over the years.
Layout Mistakes That Undermine Everything Else
The most common failure in small bathroom design isn’t materials or lighting — it’s spatial planning. Beautiful finishes installed in a poorly planned layout still produce a room that feels wrong. These are the errors worth catching before the renovation starts.
- Ignoring clearance minimums: The National Kitchen & Bath Association (NKBA) recommends at least 21 inches of clear floor space in front of the toilet and vanity — 30 inches for comfortable movement. The minimum clear opening at a shower entry is 24 inches. These aren’t suggestions. Violate them and the room will feel physically uncomfortable regardless of how it looks.
- Putting the toilet in the entry sightline: The first thing you see when the door opens sets the tone for the entire room. Where plumbing allows, position the entry sightline toward the vanity, a backlit mirror, or a feature tile wall. This one layout decision shapes the entire experience of the space.
- Forcing a freestanding tub into a tight footprint: A freestanding tub in a small bathroom creates narrow gaps along every wall — too tight to clean, too awkward to use. A well-designed curbless walk-in shower is more functional, more visually open, and more practical for day-to-day use.
- Ignoring the door swing: A standard inward-swinging door can consume a meaningful chunk of usable floor clearance when open. A solid-core pocket door or an outward-swinging door recovers that space without any structural change to the room itself.
If you’re renovating in stages rather than all at once, address the layout and plumbing decisions first. Moving fixtures after tile and finishes are in place is expensive and disruptive. Get the bones right, then work outward to materials and lighting.
Sources
- The Washington Post – Home & Design Architecture Guidelines
- Elle Decor – Luxury Small Bathroom Concepts & Material Direction
- Houzz – Small Bathroom Remodeling and Space-Planning Rules
- Porcelanosa – Architectural Tile and Bath Systems
- Gowly Bathroom – Concealed Cisterns & Wall-Hung Sanitaryware Analysis
- Drench UK – Bathroom Layout Planning and Common Remodel Mistakes
- Urban Ambiance – Bathroom Lighting Principles, CRI, and Kelvin Specifications
Frequently Asked Questions
Why does a wall-mounted floating vanity make a small bathroom look bigger?
A floating vanity leaves the floor tile running completely uninterrupted all the way to the wall, eliminating the visual stop created by a solid cabinet base. By removing this barrier, the eye perceives greater depth and the room registers as having more open floor area. Adding low-voltage LED strip lighting underneath enhances this effect by casting a soft glow across the floor that makes the cabinet appear weightless.
What are the minimum floor clearances required for a small bathroom?
According to the National Kitchen & Bath Association (NKBA), you need at least 21 inches of clear floor space in front of both the toilet and vanity, with 30 inches recommended for comfortable movement. In addition, walk-in shower entries require a minimum clear opening width of 24 inches. Overlooking these spacing standards results in a bathroom that feels physically restricted and uncomfortable to use.
What tile size is best for making a small bathroom feel larger?
Large-format porcelain or natural stone slabs measuring 24×24 inches or larger are ideal because they dramatically cut down on the number of grout joints. Busy mosaic or geometric patterns produce hundreds of intersecting boundary lines that visually clutter compact spaces. Pairing large-format tiles with closely matched grout running all the way from floor to ceiling creates an unbroken plane that makes ceilings feel taller.
What Kelvin color temperature and CRI should you choose for bathroom lighting?
Choose a Color Rendering Index (CRI) of 90 or higher to ensure natural skin tones, stone veining, and textiles appear accurate and vibrant. For ambient ceiling fixtures and accent niches, stick to a warm temperature range between 2700K and 3000K. For task sconces flanking the mirror, 3000K to 3500K provides crisp grooming clarity without feeling sterile or clinical.
When is the best time to install a concealed cistern wall-hung toilet?
A wall-hung toilet with a concealed cistern must be installed during a full renovation while wall framing is exposed. Because the steel carrier frame and water reservoir sit inside the wall stud cavity, access to rough-in plumbing and framing is required before tile is laid. This fixture clears floor space beneath the bowl for easier cleaning and noticeably dampens flush refilling noise.
Why should you stick to one metal finish in a compact bathroom?
Mixing multiple metal finishes in a small space introduces unnecessary visual interruptions where room for contrast is already limited. Holding to a single finish—whether unlacquered brass, brushed nickel, matte black, or polished chrome—across faucets, shower trim, towel bars, and the toilet flush plate creates clean architectural cohesion. This unified discipline prevents the space from feeling cluttered or assembled piecemeal.
