
That single ceiling fixture is not neutral. It is actively working against you. The same light that gets you through your morning routine does nothing useful for an evening soak. It flattens surfaces, creates shadows in the wrong places, and keeps your brain alert when it should be winding down. Getting bathroom lighting right is not about finding one better fixture. It means building three layers that work independently, choosing bulb specs that actually affect how calm a space feels, and knowing the safety rules. All of that comes before the first fixture goes on the wall.
The Three-Layer Lighting System That Makes a Bathroom Work
Professional lighting designers do not rely on a single source in any room. Bathrooms need this approach more than most. The space has to serve two very different purposes: a sharp, functional environment in the morning and a calm, low-stimulus one at night. Three distinct layers handle this. Each one does something the others cannot.
Ambient Lighting: Your Room’s Base Layer
Ambient light is the general illumination that allows you to move through the room safely. The most common mistake here is a single high-intensity ceiling fixture in the center. It lights the floor, deepens shadows at the edges, and gives you no flexibility. Perimeter downlights or flush-mounted fixtures positioned to bounce light off walls are a better approach. When this layer runs on its own dedicated switch, you can reduce overall brightness during evening use and let the accent layer take over.
Task Lighting: Where Most Bathrooms Get It Wrong
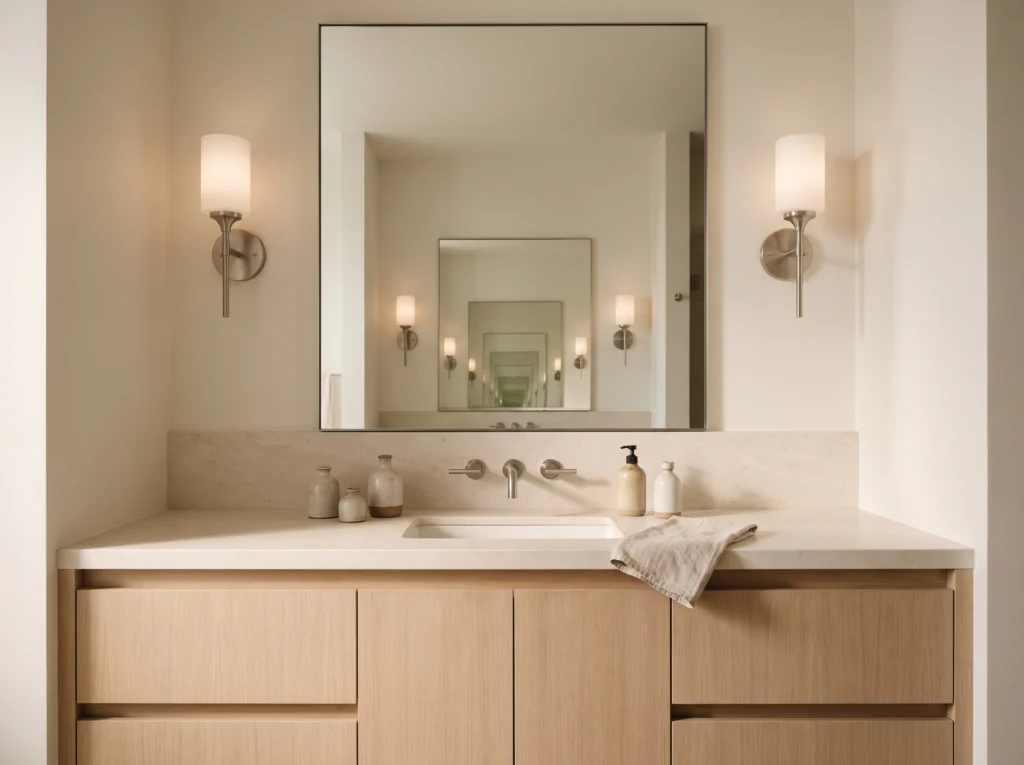
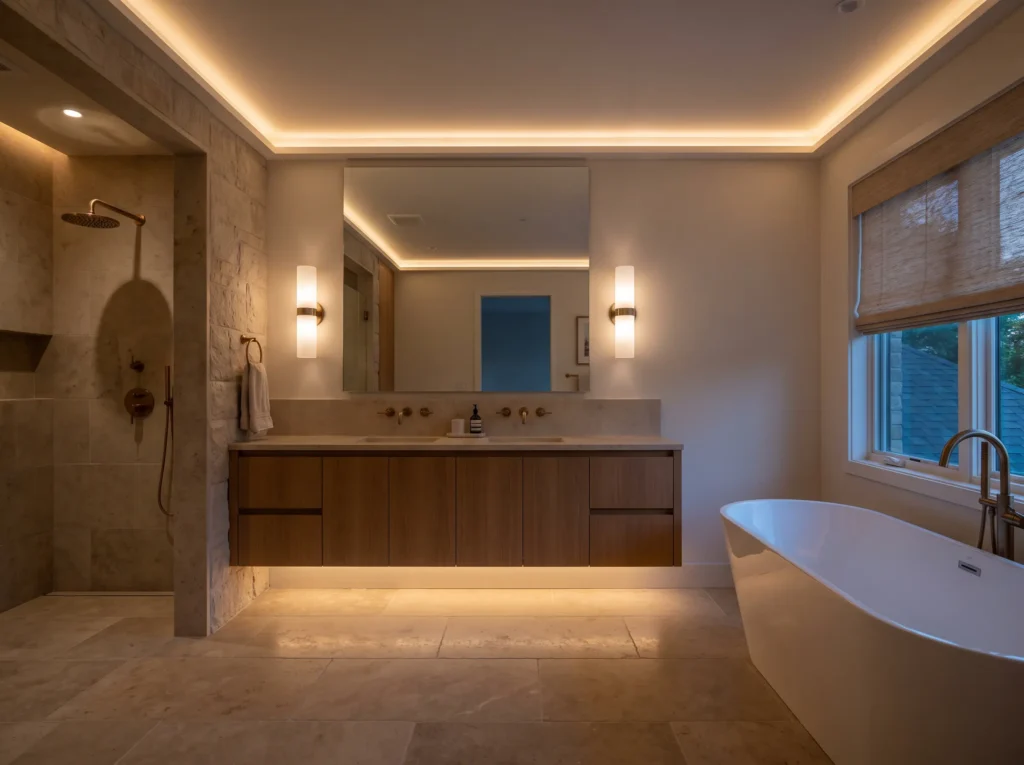
A fixture directly above the mirror is not task lighting. It is shadow-making. Light cast downward from above your head creates deep shadows under your eyes, nose, and chin. Those are the exact conditions that make accurate grooming, skincare, and makeup application nearly impossible. Wall sconces mounted at eye level on both sides of the mirror provide balanced, cross-illuminating light that falls evenly across your face. If you can only change one thing about your current setup, this is it.
Accent Lighting: The Layer That Changes How the Room Feels
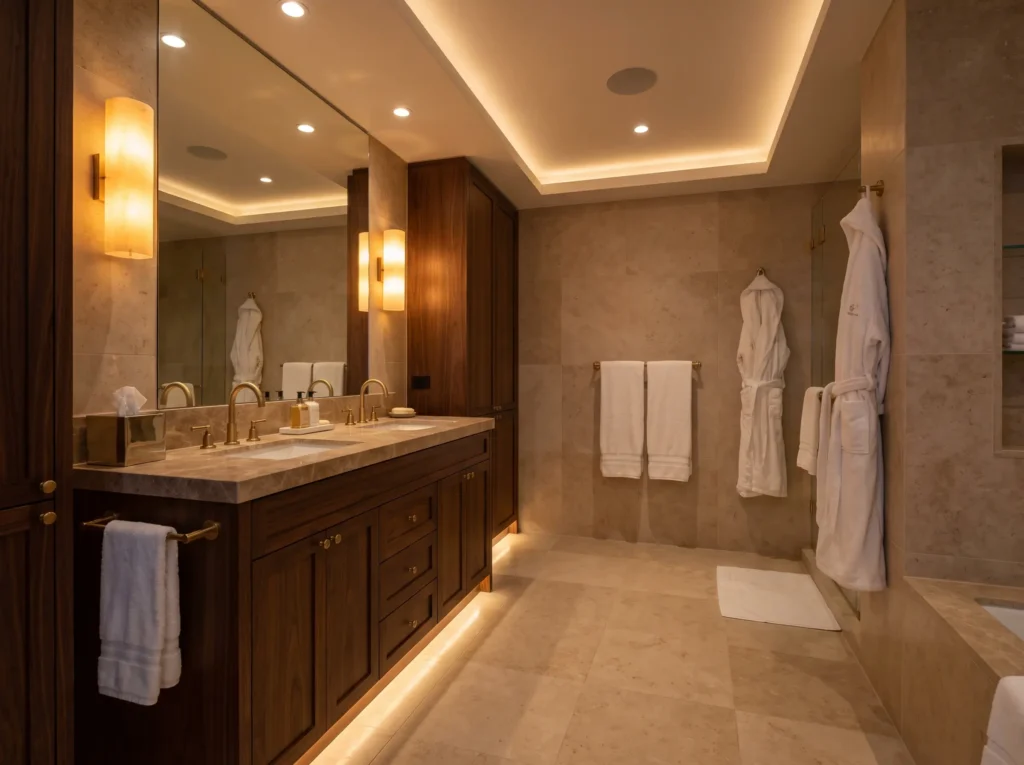
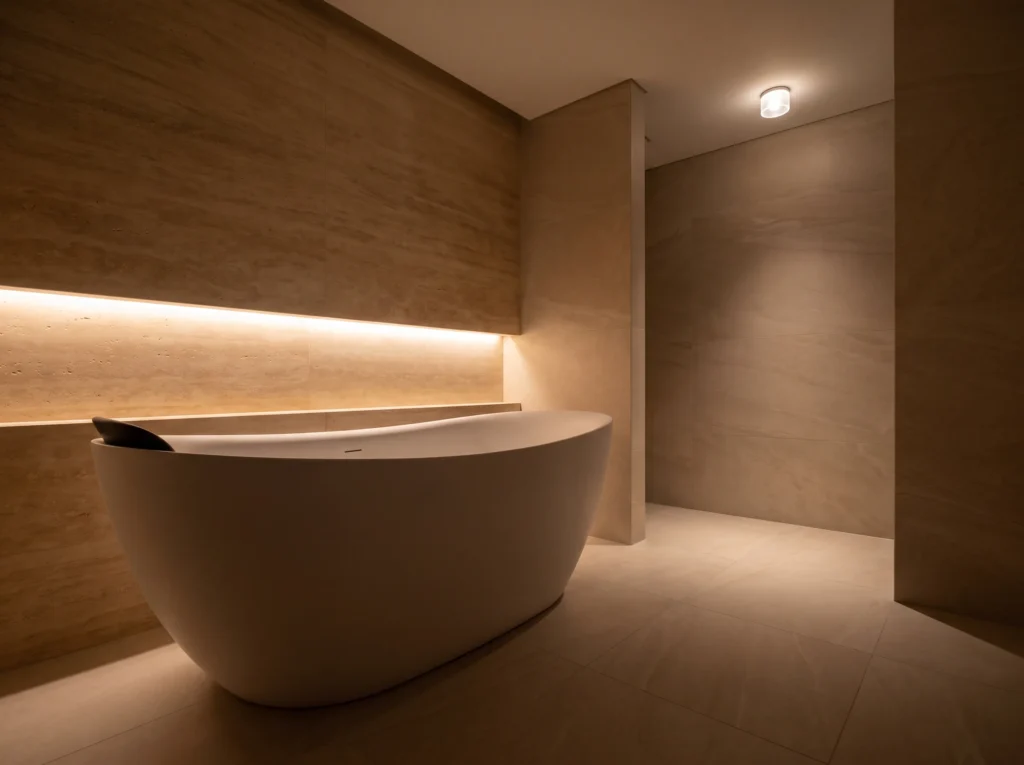
Accent lighting is what separates a functional bathroom from one that actually feels good to be in. Low-voltage LED strips placed under a floating vanity, along toe-kicks, inside a recessed shower niche, or behind a mirror frame produce a gentle indirect glow with no visible glare source. LED strip lighting is also one of the easier retrofits in a bathroom — many systems run on low voltage and can be added without touching the mains wiring. These fixtures solve a practical problem most people do not consider until they need it. A subtle toe-kick light means full overhead brightness is unnecessary for nighttime visits. That alone is worth the effort.
Choosing the Right Bulb: Color Temperature and CRI
The fixture matters less than what goes inside it. Two bulbs that look identical in the store can produce completely different results — one calming and flattering, the other cold and clinical. The difference comes down to two specs: color temperature and CRI.
Stay Between 2700K and 3000K for a Warm, Restful Glow
Color temperature is measured in Kelvin. Lower numbers produce warmer, amber-tinted light. Higher numbers move toward cool blue-white. For a restful bathroom, stay between 2700K and 3000K. That range replicates the warmth of older incandescent lamps. It also does something specific: warm light in the late evening signals to your body that daylight is ending. That is the biological nudge that makes winding down easier. Anything above 3500K starts to feel stark. Save cooler temperatures for kitchens and workspaces.
Why CRI 90 or Higher Matters More Than Wattage
The Color Rendering Index — CRI — measures how accurately a light source shows colors compared to natural daylight. The scale runs from 0 to 100. A CRI below 80 makes tile look dull and skin look gray. It becomes nearly impossible to judge a foundation shade, a paint color, or even how rested you look under that light. Go for CRI 90 or above. Every surface in the room will look the way it is supposed to. Accurate skincare routines become possible under artificial light, and that matters more than most people account for when buying bulbs.
How Dimmer Switches and Separate Circuits Give You Real Flexibility
The single most effective upgrade in a bathroom is a dimmer switch. Not a new fixture. Not a renovation. A dimmer. Installing one takes a couple of hours, costs very little, and changes what the room can do entirely.
A few wiring decisions that multiply the effect:
- Separate circuits for each layer. Wire your ambient downlights, vanity sconces, and accent strips to independent switches. This lets you cut the task lighting during evening use and keep only the accent layer active. The change in the room’s feel is immediate.
- Dimmers on every circuit. Not just the ambient layer. Dimmer controls on each switch let you fine-tune the balance across all three layers rather than toggling between fully on and fully off.
- Plan before the drywall goes up. If you are mid-renovation, this is the decision that is hardest to undo. Map your circuit paths and switch positions now. Running additional wiring after walls are closed costs far more than doing it during the build.
Positioning Bathtub and Shower Lighting Without Glare
A reclined bath should feel like a release. It rarely does when a bright downlight is directly above your face. The fix is not a dimmer — it is placement.
- Shift tub fixtures off-center. A downlight positioned directly above where your head rests forces your eyes toward the light source the moment you lie back. Moving the fixture toward the foot of the tub or toward an adjacent wall solves this entirely.
- Aim light at surfaces, not people. Directing a ceiling fixture toward a tiled feature wall reflects light back as a diffused wash rather than a direct beam. The overall illumination is softer and more even.
- Use frosted lenses or deep baffle trims on recessed fixtures. These conceal the bulb from the horizontal sightlines your eyes are at when you are lying down. They distribute light more evenly across the ceiling rather than concentrating it in one spot.
Bathroom Lighting Safety: Damp Ratings, Wet Ratings, and IP Zones
This is where most people discover the problem after the fact — either when a fixture fails early or when an inspection flags a code violation. Bathroom lighting has specific safety requirements that are straightforward once you know the categories.
Damp-Rated vs. Wet-Rated: Know This Before You Buy
Under the National Electrical Code (NEC), fixtures near water sources must carry appropriate certification:
- Damp-rated fixtures are built for high humidity, steam, and condensation — but not direct water contact. Use them for general ceiling positions and vanity wall sconces.
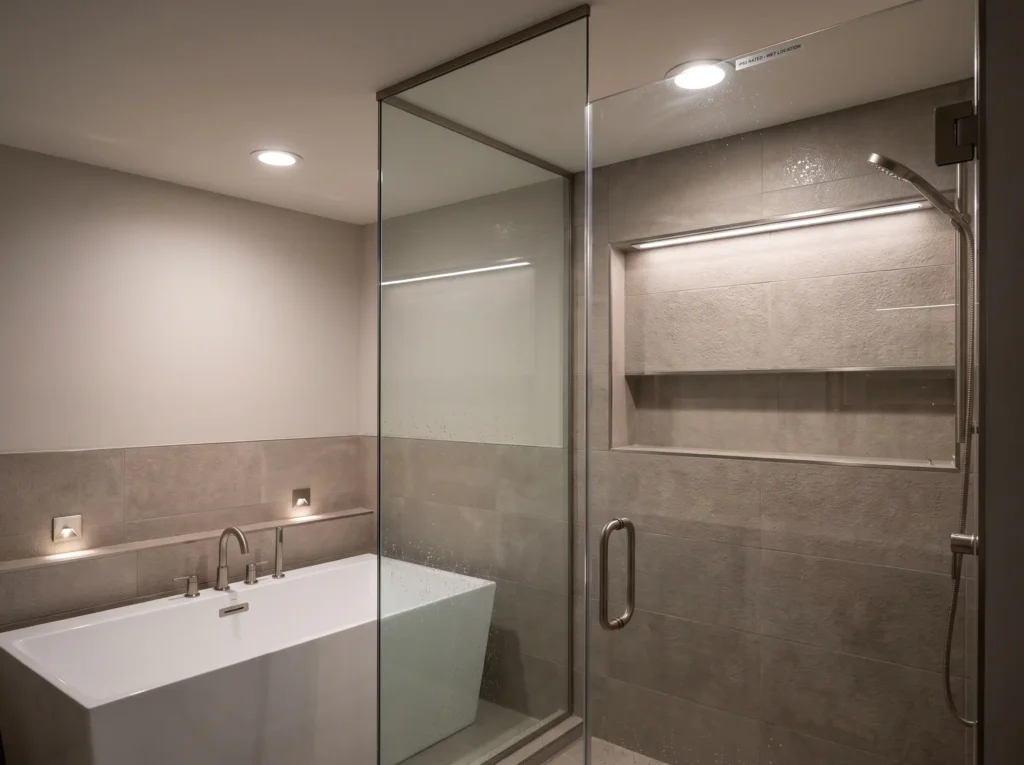
- Wet-rated fixtures include waterproof seals and gaskets designed for direct water spray. These are required inside enclosed showers and directly over tubs where spray can reach.
Installing a standard residential fixture inside a shower enclosure because it looks right is a fire hazard and a building code violation. It is also one of the most common mistakes in DIY bathroom updates — and one of the most preventable.
How IP Zones Determine Where Each Fixture Can Go
International safety standards divide the bathroom into proximity zones based on distance from water sources. Each zone requires a minimum Ingress Protection (IP) rating:
- Zone 0 — inside the bath or shower basin: Requires at least IP67, meaning full protection against submersion.
- Zone 1 — directly above the bath or shower up to 2.25 meters: Requires at least IP65, protecting against continuous water jets.
- Zone 2 — extending 0.6 meters beyond Zone 1, and around washbasin faucets: Requires at least IP44, providing splash-proof protection.
- Outside zones — general dry areas: Standard IP20 fixtures are permitted. Fitting IP44 throughout the ceiling is practical regardless, since bathroom steam travels further than most people expect.
If you are not sure which zone a specific location falls into, measure from the nearest water source before purchasing anything.
The Most Common Bathroom Lighting Mistakes
- A single overhead fixture. It covers nothing particularly well. Corners stay dim, shadows fall in the wrong directions, and the room forces you to choose between excessive glare and inadequate visibility with no middle ground.
- Clear filament bulbs at the vanity. These look good in catalog photos. In practice, a bare Edison bulb produces a tight, hard point of light directly in your line of vision. Frosted or milk-glass shades spread the same output far more evenly.
- No low-level pathway lighting. If the only option at 3 a.m. is full overhead brightness, that is what gets used. A toe-kick light or a nightlight mode on a smart switch solves this with almost no effort.
Getting the Layout Right Before Anything Goes on the Wall
The decisions that are hardest to undo — circuit positions, switch box locations, fixture rough-in heights — all happen before you can see the finished room. That is exactly when the full three-layer plan needs to be in place, not after the walls are closed.
Sketch where each layer lives. Mark your zone boundaries. Confirm your IP ratings before ordering fixtures. The lighting you end up with will not just be safe. It will work differently at 7 a.m. than it does at 10 p.m. That difference is the whole point — a bathroom that functions as a utility space when you need it to, and a retreat when you do not.
Sources
- Simple Lighting UK — Bathroom Lighting Guides and Layering Techniques
- Lumens — How to Choose the Right Bathroom Lighting and CRI Standards
- Plumbworld — Lighting Zones and Bathroom Ambiance Planning
- Jaquar Lighting — Principles of Layered Bathroom Illumination
- Matrix Mirrors — Color Temperature (Kelvin) and CRI for Vanity Spaces
- Light Can Help You — Bathtub Lighting Placement and Glare Prevention
- Kurtzon Lighting — Damp vs. Wet Location Requirements and NEC Guidelines
- Gunter & Co — Spa-Style Bathroom Lighting Circuits and Controls
Quick Comparison
| Lighting Layer | Primary Purpose | Ideal Placement | Common Mistake to Avoid | Control & Switching |
|---|---|---|---|---|
| Ambient | General illumination and safe room navigation | Perimeter downlights or flush-mounts bouncing off walls | Single high-intensity central ceiling fixture | Dedicated circuit with dimmer switch |
| Task | Accurate grooming, makeup, and skincare routines | Eye-level wall sconces mounted on both sides of mirror | Downward-pointing light directly above the mirror | Independent circuit with dimmer switch |
| Accent | Visual warmth, relaxing mood, and low-stimulus night visits | Under floating vanity, along toe-kicks, shower niche, or behind mirror | Relying on overhead lights at night with no low-level path light | Separate low-voltage circuit or switch |
Frequently Asked Questions
What is the best color temperature for bathroom lighting?
The ideal color temperature for a relaxing bathroom is between 2700K and 3000K. This range produces a warm, amber-tinted glow that mimics traditional incandescent bulbs and signals to your body that it is time to wind down. Light above 3500K begins to feel stark, cool, and overly clinical.
Why is CRI important for bathroom vanity bulbs?
A Color Rendering Index (CRI) of 90 or higher ensures that artificial light reveals skin tones, makeup shades, and tile colors accurately compared to natural daylight. Bulbs with a CRI below 80 make surfaces look washed out and skin appear dull or gray. High-CRI lighting is essential for precise grooming and skincare.
Where should vanity lighting be placed to avoid facial shadows?
Mount wall sconces at eye level on both sides of the mirror to provide balanced, cross-illuminating light that falls evenly across your face. Placing a fixture directly above the mirror casts harsh downward shadows under your eyes, nose, and chin, making grooming difficult.
What is the difference between damp-rated and wet-rated bathroom fixtures?
Damp-rated fixtures are built to handle steam, moisture, and condensation, making them suitable for general ceiling placements and vanity walls. Wet-rated fixtures feature waterproof seals and gaskets designed to withstand direct water spray. Wet-rated fixtures are required inside enclosed shower stalls and directly over bathtubs where water spray can reach.
What IP rating do I need for shower and bathtub lights?
Fixtures installed inside the bath or shower basin (Zone 0) require at least an IP rating of IP67 for full submersion protection. Lights placed directly above the bath or shower up to 2.25 meters (Zone 1) must carry a minimum of IP65 to guard against continuous water jets. Areas extending 0.6 meters beyond Zone 1 (Zone 2) require at least IP44 for splash resistance.
Why should bathroom lighting be on separate circuits?
Wiring ambient downlights, vanity sconces, and accent strips to independent circuits lets you tailor illumination to the time of day. You can shut off bright task sconces in the evening while leaving subtle accent strips active. Adding dimmers to each circuit provides granular control over brightness across all three layers.
